
Planning an Art Exhibition?
Our article Art Show: How to Successfully Launch Your First Art Exhibit (yourartempire.com) gives you all the info you need to prepare your work and nail your marketing.
But some venues, particularly pop-up art exhibition spaces, will require you to hang your art up on the walls, too.
How you hang your work can make or break a show – sometimes literally if the art falls down!
This nuts and bolts guide to picture hanging hardware will help you to choose the best tools and techniques to make your work look it’s best.
Design your layout
Depending on your venue, you might have lots of time to put your art up, or you might be on a tight schedule.
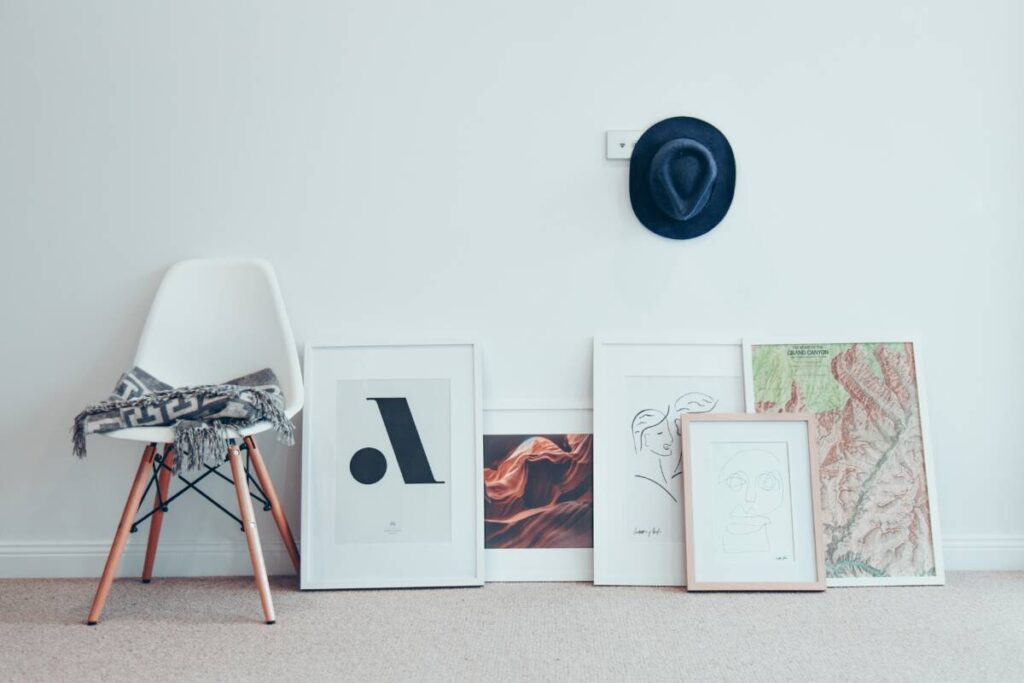
If you have time, it’s great to get all your work into the space and play around with different layouts and combinations. Lean your work up against the walls (cushion the floor with blankets or bubble wrap to protect against knocks while you’re moving it around)
and it’s often surprising how your works look in a different space.
For locations that require a quick set-up, ask for the dimensions of the space and then make a model to help you plan. This will at least give you an idea of how everything fits in. You might draw the space out on paper and use cut out photos of your work (to scale), or draft a plan digitally. Whatever helps you to start visualizing the space.
Professional picture hanging styles
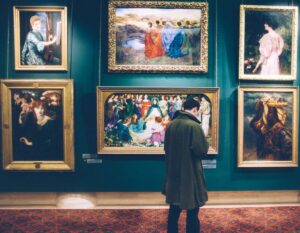
There are a few standard layouts that museums and galleries are likely to use when designing an exhibition. It’s helpful to keep these rules in mind – even if they’re only there to be broken!
Firstly, many galleries hang their pictures at a standard height, so they usually position the center of the artwork somewhere between 150-160cm / 59-63”, and plinths are often around 90cm / 35” high. These heights might feel a little lower than you expect, but they are used to help make the works accessible for all visitors.

So the most commonly used hang style is the center line hang. For this, the horizontal center of all your artworks will be hung at the same height. This is the easiest style for beginners.
Sometimes, the pieces will be arranged with all of the top edges in a line. For this, you need to plan carefully so that you choose a hang height that works well with differently sized works.
A bottom line hang is also occasionally used.
You might want to arrange some works in a ‘double-hang’, where you have two pieces one above the other. If you have a series of works you can decide your spacing between them and then hang the set as a single piece. For example, if you hang a set of 4 pieces in a 2 x 2 grid, the centerline would sit in the gap between the top row and the bottom one.
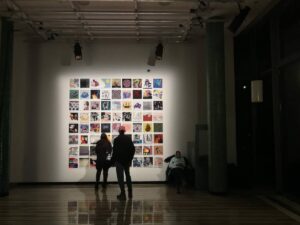
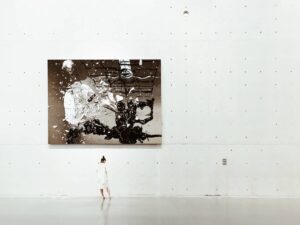
A ‘Salon Hang’ is also often used for exhibitions with lots of pieces and/or limited space. This is where pieces are hung to cover the whole wall space – ceiling to floor. It can be tricky to pull off, but looks amazing when done well.
How do I hang pictures like a pro?
How to hang pictures depends on four main things:
- The requirements of your venue
- What kind of walls you are hanging on
- How big/heavy your work is
- How secure you need your works to be (or how easily you need to be able to remove them, for example, if you’re selling off the wall)
The main types of picture hanging hardware are:
- From a picture rail. If your venue has a picture rail, you need chains or wires to connect your work to the rail. Picture rails are great, they make positioning your work easy and look good.
- Wires or strings. This is the way you’ll likely hang pictures at home. A picture wire or string is attached to the back of your work at around 1/3 of the way down. You then attach it to the wall on a nail, screw, or a picture hook (also known as an X hook). The pros tend to use a screw, or a screw with a rawlplug if you’re hanging on plasterboard or masonry. For delicate walls (such as older venues) use a picture hook. To properly position this, pull the wire or string up as far as it will go and then measure the distance to the top of the picture. Hold the piece up to the wall where you want it to hang, and mark the top onto the wall (using masking tape or pencil). Then measure down from this top mark to find your fixing height. This is where you want your screw or picture hook.
- Screwed fixings. A large gallery or museum will most likely use a screw fixing to hang their pictures. These fixings, such as mirror plates, spring lock fixings, or L brackets are screwed onto the artwork and then to the wall. They offer better security and can handle heavier pieces. Mirror plates and spring lock fixings are typically attached halfway down the sides, making it a doddle to hang to a centerline. Larger work might need additional fixings at the top and bottom, or pieces that are so big that they are hard for two people to handle should have L brackets underneath to take their weight, with mirror plates or spring lock fixings to pin them to the wall. Finally, galleries will paint over the exposed part of the fixing to blend them into the wall.
- Split batons (also known as French cleats or Z bars). These handy fixings are used on work where other types can’t be attached – such as work on aluminum panel. They are made up of two strips that interlock, one is fixed to the wall while the other is glued to the back of the work. You then simply slot the baton on the back of the work over the one on the wall. They’re incredibly neat, but not very secure.

Also to think about, sometimes you might need to hang pictures in a way that doesn’t damage the walls at all, for example, if you’ve found an unusual venue that doesn’t typically show art. Here, you might need to use removable fixings like Command Strips (for lighter pieces) or take easels to display your work. But never use sticky foam pads in an exhibition – they are horrendous to remove, so many venues ban them. Instead, try hook and loop tape or museum gel tape, which are easy to use and give a professional finish.
Ready to go? Here’s a shopping list to get you set up.
Essential picture hanging hardware and tools
A drill / driver. This Makita Drill Driver is a handy size but is still powerful enough to take on most tasks. Add a spare battery for pro level preparedness.
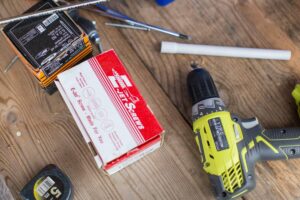
Spirit level. Essential for a sharp finish, and it is worth buying a longer spirit level if you can so it can reach between two pictures. Try this one from Rolson.
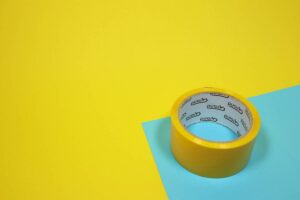
Masking Tape is handy for a bunch of uses, from tacking up your exhibition labels to marking the positions of pictures.
Fixings. Stock up on a range of picture hanging hardware for different kinds of pictures and different kinds of venues, and you’ll never be caught out. Consider adding these to your tool kit…
- Screws Assortment and Rawlplugs
- Command Picture Hanging Strips – for damage free picture hanging.
- Picture Hanging Kit – Wire – this kit has all you need, with D rings, screws, wires, and crimps for a professional finish.
- Picture Hanging Kit – String / Cord – another complete kit, this time for hanging on string, which has a little more give but many artists find more pleasant to use.
- Picture Rail Wires – wires and hooks for hanging from a fixed picture rail.
- Mirror Plates – the most common fixing in galleries.
- L Brackets – for heavy pictures.
- Picture Hooks – for delicate walls.
- Spring Lock Fixings – for added security.
- Split Batons – for hanging work that’s hard to fix to.
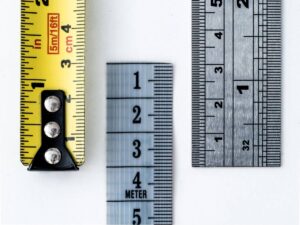
For your pocket – keep pencils, a handy notebook, and a tape measure close by
Helpful extras
Laser Level – great if you have a lot of small works, and makes hanging pictures with mirror plates on a center line a piece of cake.
Glass Cleaner – to give your pictures a final polish.
Utility Knife – gives a crisp finish that looks way more professional than scissors

Hook and Loop Tape – great for fixing labels, signs and posters. This can take a little weight and you can reposition which makes it easier to get things level.
Museum Tape – a clear gel tape for attaching small items to the wall and fixing work to plinths or easels.
Conclusion
If you’re new to putting up art exhibitions, it can be a bit daunting trying to figure out how to make your work look its best and what picture hanging hardware you need. But the right tools can take the work out of putting up an art exhibition, and make it much more fun. Investing in a few pieces of kit can make your show look a million dollars.
Got some great hacks for hanging pictures? Share your tips in the comments.